
Every year, we see advancements in digital analytics tools that significantly help monitor and manage our online presence. One of the digital analytics tools you should pay attention to is Google Analytics and its latest version of Google Analytics 4. Read on to know how you can add Google Analytics 4 to your WordPress website.
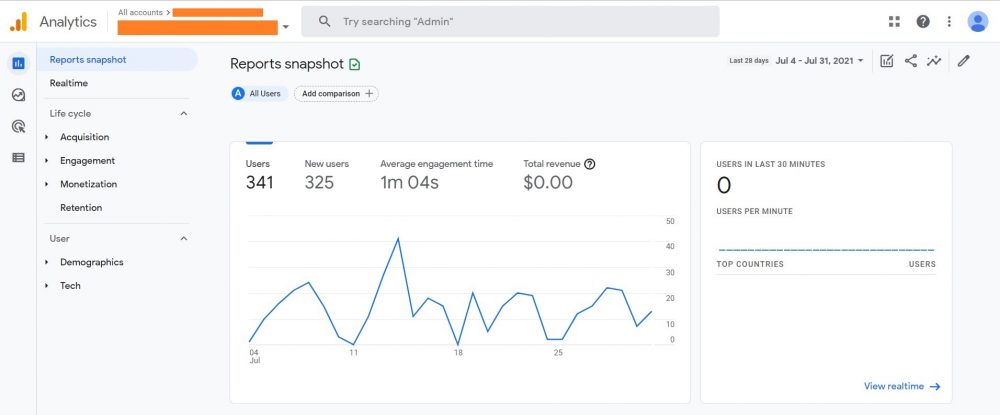
Google Analytics 4 Dashboard
What is Google Analytics 4?
Google Analytics 4 is a newer and more intelligent version of Google Analytics. It is formerly known as “App + Web,” which builds on the foundation of the App + Web property. As such, with this new version, you can monitor not only your website but also an app that you may have running alongside your website. Of course, Google Analytics 4 also allows you to monitor both.
Moreover, this latest version has machine learning at its core, allowing you to retrieve significant insights regarding your customer needs automatically. These insights may include how they respond to your online activities on whatever platform or device they are using.
As such, with Google Analytics 4, you can collect more intelligent insights to help improve your marketing decisions. It also allows you to see how your existing customers, including your potential clients, interact with your brand online. Lastly, it helps gather, retain, and use data to help ensure that you meet customer expectations.
How to Add Google Analytics to your WordPress Website
Follow the steps below to add Google Analytics 4 to your WordPress website:
STEP 1: Go to Your Google Analytics Account
The first step is to head to Google Analytics and log in or register using your Google account. After successfully logging into your account, you get access to your Google Analytics 4 dashboard.
STEP 2: Create a New Google Analytics 4 Property
The next thing to do is to create a new Google Analytics 4 property. To do this, you can click on “Admin” located at the lower-left section of your screen and then hit on the “Create Account” button.
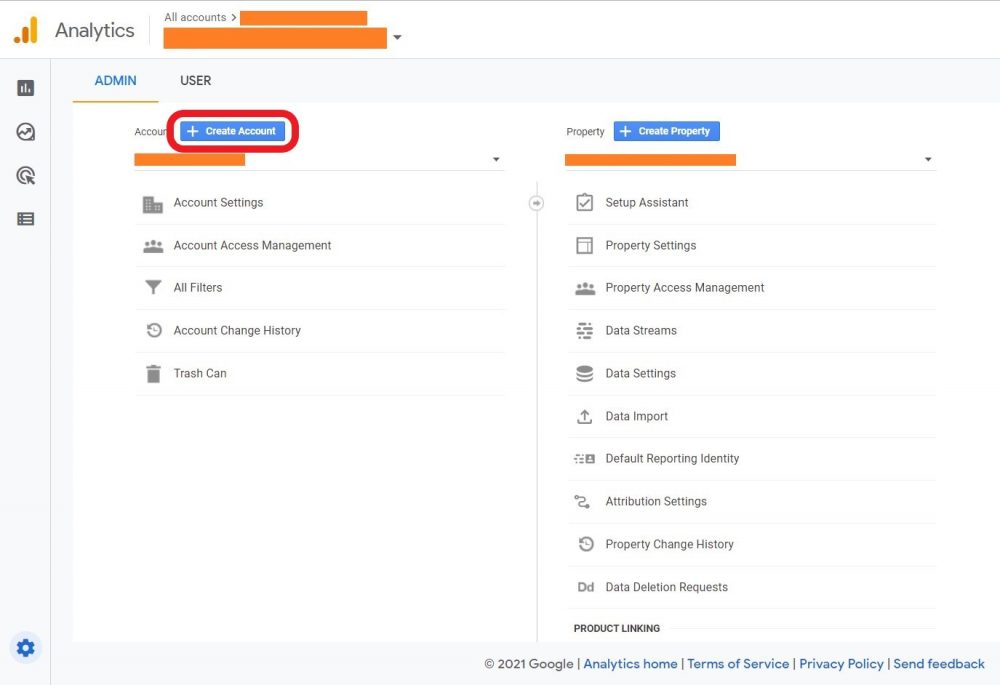
You can also choose an existing account where you want your property set up.
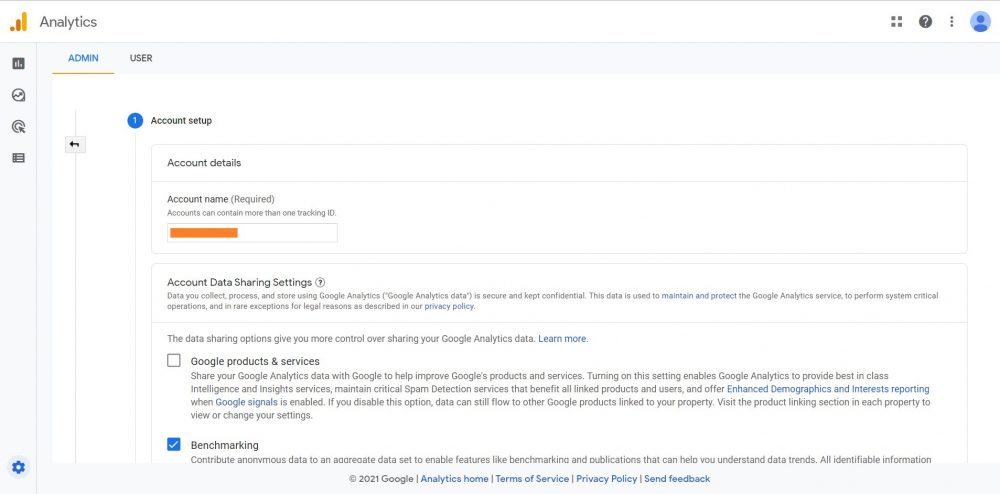
After that, you have to enter an account name. Then, click on the “Next” button.
STEP 3: Enter Property Details
Next, you have to hit on the “Create Property” button. Doing so will then take you to the Property Details page, where you can enter all the required property information. As such, you need to enter your property name, indicate your time zone, to name a few.
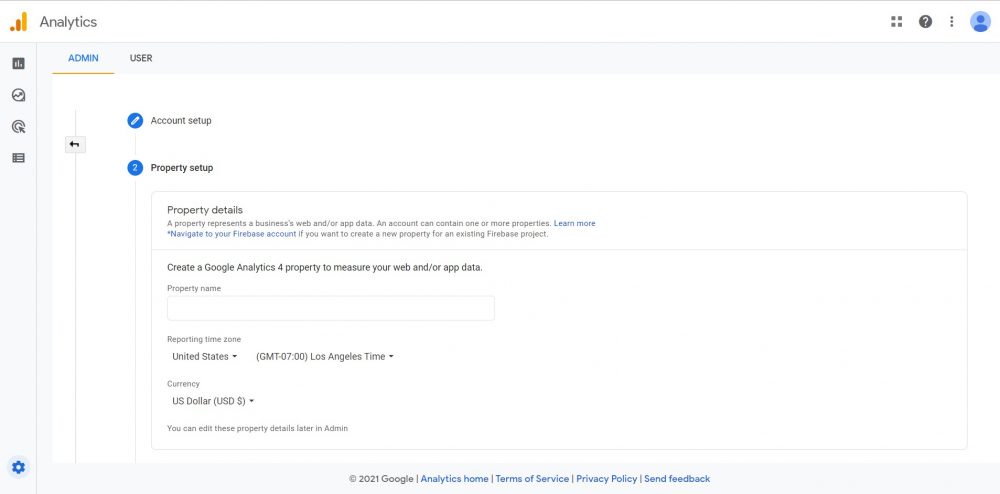
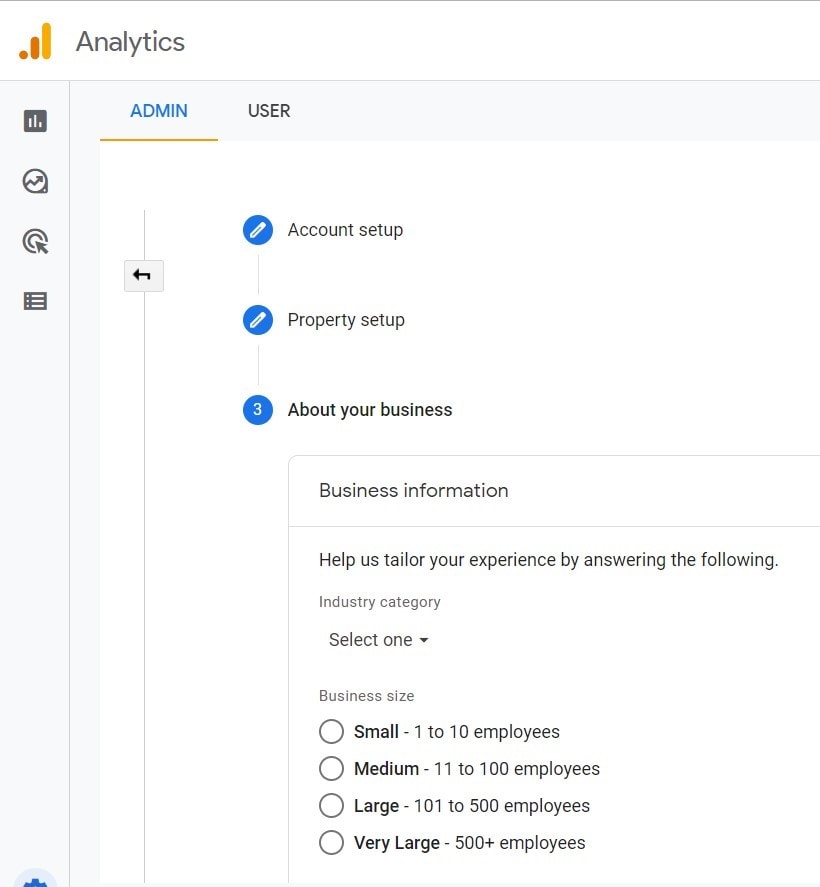
After entering all the required information, you can hit on the “Next” button. The following section labeled “About your business” will ask you to input particular information about your business, such as your business size and how you plan to use Google Analytics with your business. Tick all the choices provided that apply.
Once you are done, you can click on the “Create” button and then accept the Google Analytics Terms of Service to complete the process.
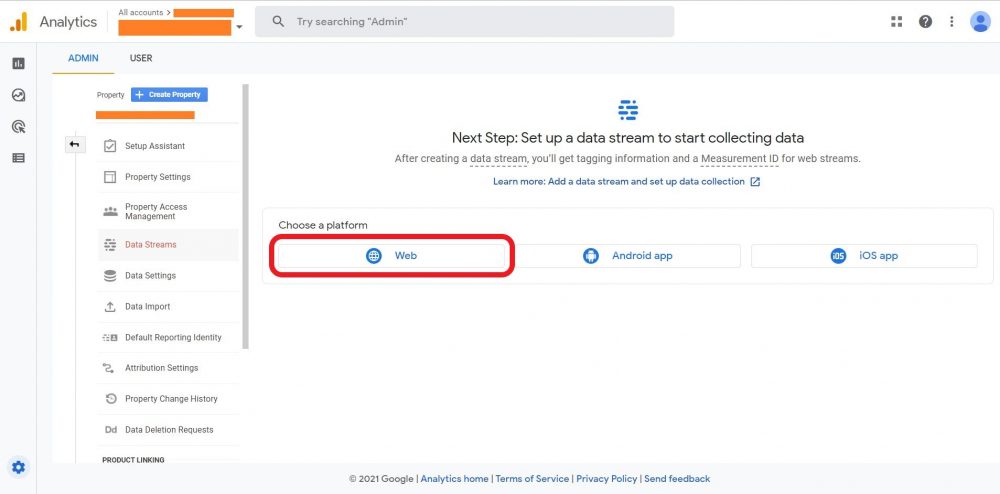
STEP 4: Choose “Web” Option
After creating your account, Google Analytics will take you to the “Data Streams” page, where it will provide you with three options: Web, Android App, and iOS App. Hit on the “Web” button.
STEP 5: Set Up the Web Stream
Once you have clicked the “Web” option, you will see a screen that will allow you to set up your web stream. Here, you will need to enter your URL and provide a name for your stream.
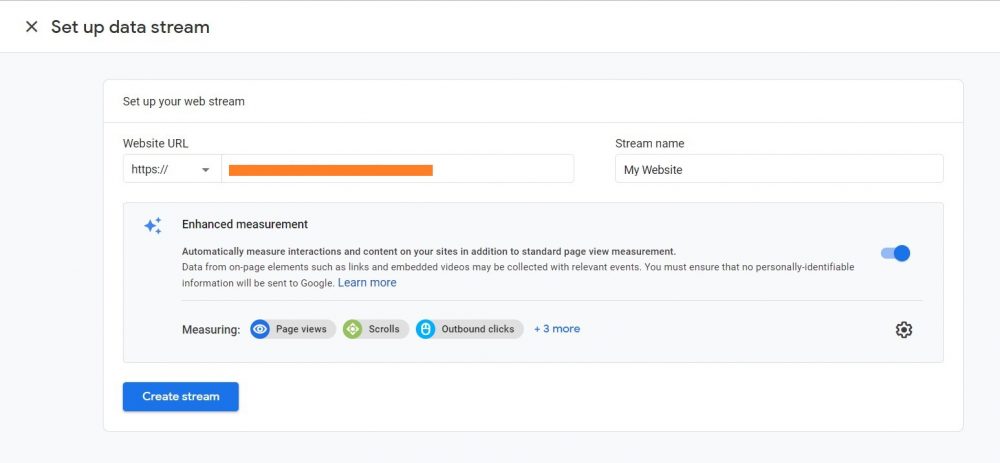
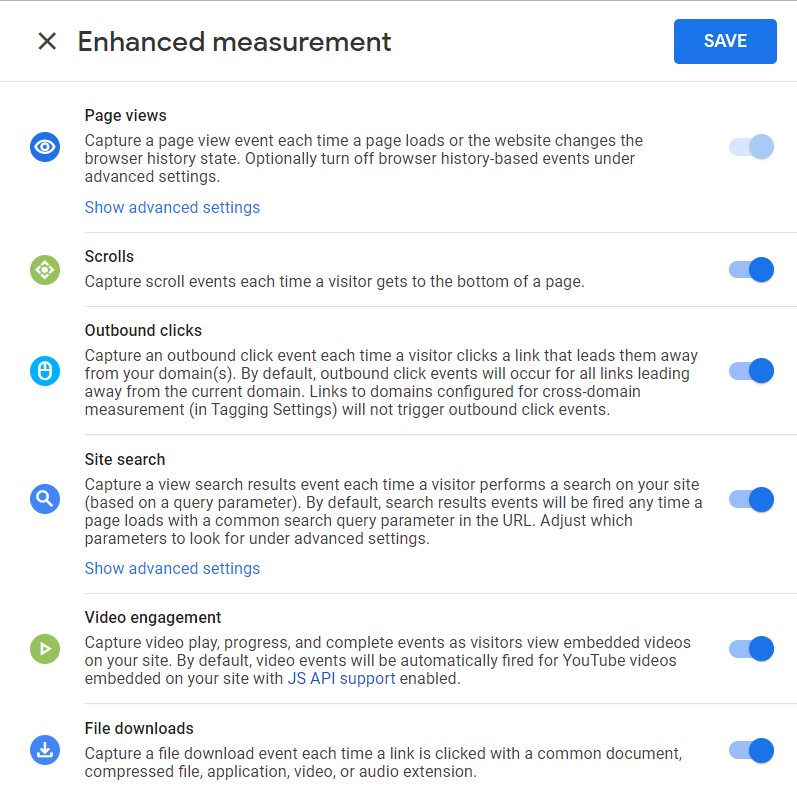
You will also be given the option to add or subtract the enhanced measurements that you want. Finally, hit the “Save” button to save whatever changes you have made.
After that, you can hit on the “Create Stream” button to complete this step. You will then see a confirmation screen showing you your unique tracking ID and the tracking code snippet, which you can use to integrate Google Analytics 4 with your WordPress website later.

STEP 6: Set Up Google Analytics Property
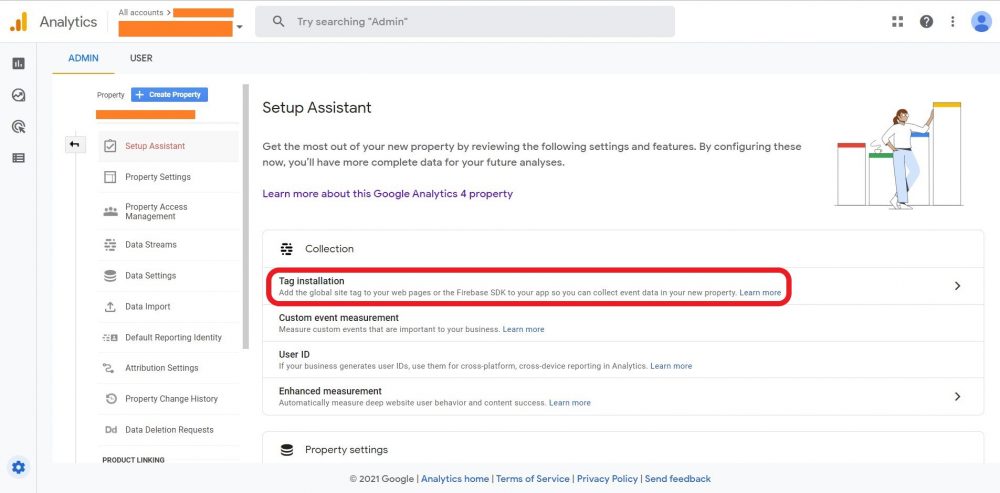
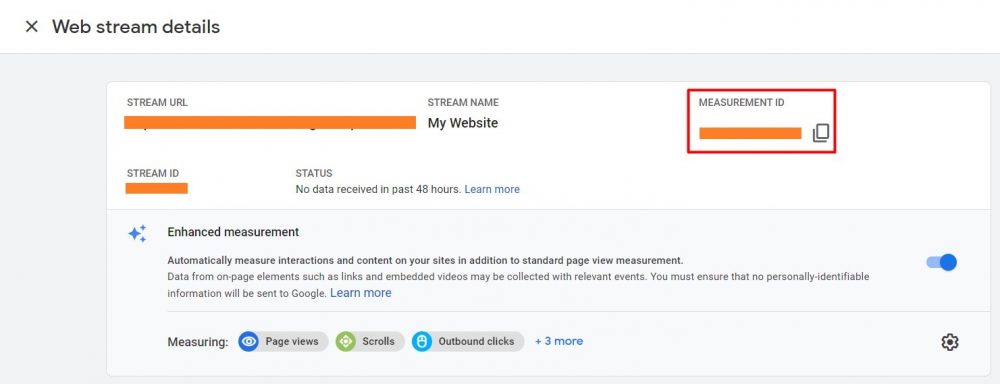
In this next step, you will need to head back to the “Admin” section of your property and click on the section labeled “Setup Assistant.” Then, click on the section labeled “Tag Installation,” and you will again see your web stream details.
Copy your web stream’s “Measurement ID.”
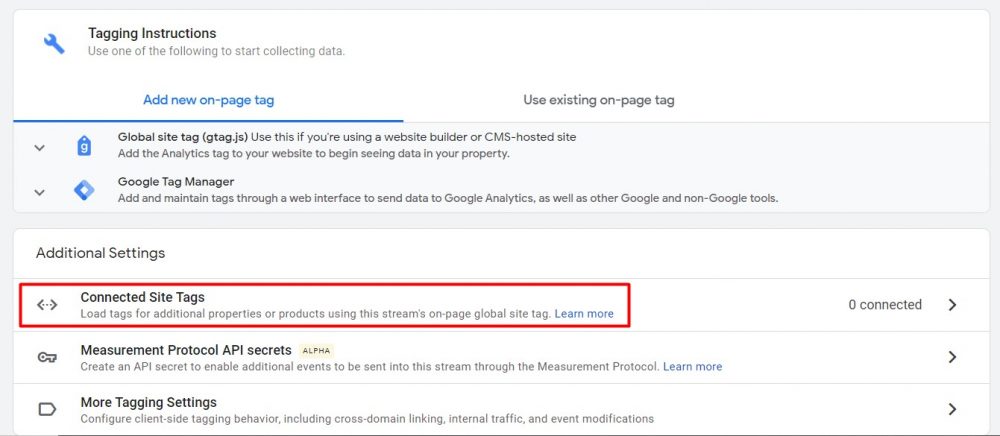
Then, head to the section labeled “Connected Site Tags.”
Enter the ID of the tag to connect. You can choose to add a nickname for this tag or not.
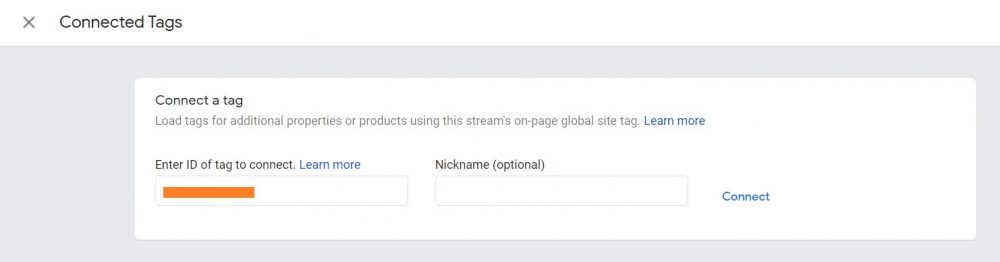
Hit on the “Connect” button to finish this step.
STEP 7: Install Tracking Code on WordPress Site
So that you can integrate your Google Analytics with your WordPress website, you will need a snippet of code—your Global Site Tag. To get this code, you need to head to the section labeled “Tagging Instructions.” Then, expand the section labeled “Global Site Tag” so that you can copy your Google Analytics 4 embed code and install it to your WordPress website.
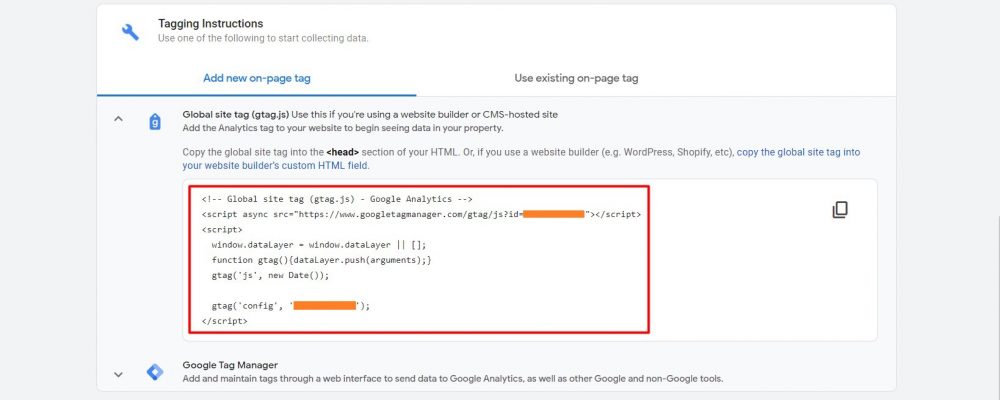
To add the code, head to your WordPress website and enter the code into your website’s “head” section. You can choose to go to your theme options and add the code, or you can add it through a plugin that lets you add code to the head, such as the Insert Header and Footer plugin. Finally, click on the “Save” button to save your code.
Integrate Google Analytics 4 with WordPress Now!
After following all of the steps mentioned above, you most probably now have a functional digital analytics tool integrated with your WordPress website. Now you can enjoy getting access to more intelligent and real-time analytics on your website’s performance.
If you need assistance in adding Google Analytics 4 to your WordPress website, please feel free to seek help from a professional WordPress developer company in the Philippines! Let us know how we can help!