WordPress Migration means moving a WordPress site from an existing server to another. Though this process temporarily halts the website’s operations, the site’s functionality will be completely restored at the end of the migration process. In most cases, the migrated website functions even better than before!
In addition to upgrading from a current hosting platform, moving a WordPress website is necessary for these additional reasons:
- Transferring to a newer, faster web server;
- Improved website performance;
- Reduced loading times;
- Boosted site security; and
- Enhanced flexibility.
However, the site will be down for some time when undergoing a website migration. Thus, you might miss out on website traffic and leads. Still, migration is necessary for running a successful site.
Migrating a WordPress site requires careful planning and expert execution to ensure that the site loads quickly and all elements function or are displayed correctly. Even if it looks like a hefty task, site migration is straightforward. It gets even easier with the right migration guide.
Why Do You Need to Migrate Your WordPress Website?
Migrating a WordPress website is necessary for improvements. For instance, you can move to a better WordPress Hosting Provider with speedier loading times and lower costs.
Here are some other situations where a website might need to undergo a migration process:
- If you want to switch your Hosting Providers.
- You want to move from one hosting type to another (ex. Managed or Virtual Private Server Hosting to Dedicated Hosting).
- You’re migrating a site under testing or development to a live environment.
- You intend to move your site to a live server.
- If you’re going to launch a new WordPress Website Design.
- You want to replace your old site with a new one.
- If you’re trying to change the site’s domain name.
- You’re changing your URL for SEO-related reasons.
- Your website is being rebranded.
- You’re moving the site from a subdomain to a Top-Level Domain (TLD) or vice versa.
- If you’re moving your subsite from a multi-site network or vice versa.
There are many reasons for WordPress Site Migration.
The Benefits of Migrating your Website
- Improved website performance. You can improve your loading speed and the overall User Experience through website migration.
- Boost site security. WordPress is a secure platform, so you can further improve your site security by updating its many security tools and plugins.
- Updated Content Management System. By migrating your website (especially from a non-WordPress platform), you can better manage your website’s content.
- Level up your SEO. WordPress is known for being SEO-friendly, which can give your content a leg up regarding online visibility.
- Enhance flexibility. Customization features are vital to any CMS platform, especially WordPress. You can improve your website’s look and functionality to your liking.
How to Migrate Your WordPress Site
Website Migrations need to account for several aspects of your site. For instance, the process can take a lot of time if you have a large website with a great deal of content, such as files and blogs.
Fortunately, if you’ve got a fully managed host, they’ll handle the migration process. But in other cases, the web hosting provider will provide a WordPress plugin to manage the transfer. The best thing about a migration plugin is that it can streamline the moving process. Sometimes, you might manually migrate your site, though this isn’t the easiest method.
But if done well, you’ll reap the benefits of having a fully-functioning website without any hiccups. But if something goes wrong, you might lose traffic and, in the worst-case scenario, the entire website. However, if you follow the steps correctly, your website will come out on top!
Pre-Migration Preparations
WordPress Migration requires proper planning and several requirements before you export your site.
Note Your Current and Destination Servers’ FTP or SFTP Credentials
Your File Transfer Protocol or SSH File Transfer Protocol credentials are on your web host dashboard. Here are some things to note as part of your servers’ credentials includes:
- IP address;
- Username;
- Password; and
- Port number (this is optional but useful if you need to work on server configuration settings.)
Have WordPress Installed on Your Intended Host
Many web hosts have WordPress automatically installed. However, if your server is dedicated, you might have to install WordPress yourself.
Find the Root Directory
The root directory contains your website and is usually labeled ‘public_html.’ This public directory is at the top of your WordPress website’s structure.
Create a Comprehensive Backup of Your Site
Before the migration process starts, you should back up your current site. Backups are integral for any WordPress Website Migration, primarily if you rely on a web host or manually migrate your site.
As a result, you’ll have an intact copy of your website as it is, including your website files, WordPress Database, and other vital website-related data. Thus, you can use it if something goes wrong during the migration process. You can count on tools like WordPress Export to create a site backup.

Ensure Both Installations Have the Same PHP Versions
If your source and destination WordPress installations’ PHP versions don’t match, you’ll have an HTTP 500 error. Make sure to check the installation versions before starting the site-moving process.
Lock Out All Users
If you have a live site with various users, locking them out is vital. You want to ensure that nobody interferes with the migration process. Fortunately, you can use the WP Maintenance Mode plugin to help you.
Log Into the Domain Registrar and Prepare the DNS Panel
The information in the DNS Panel is vital for changing your name servers or IP address and direct to the new server.
Migrating Your Site With The All-In-One WP Migration Plugin
Plenty of WordPress plugins are available today and can meet various WordPress users’ needs. Thus, many plugins can help you transfer your WordPress site to a new host. In fact, using WordPress plugins is far more agreeable than manually moving your site to another provider.
A plugin can guide you through the bulk of the hard work regarding migration. Also, a plugin can install WordPress on the new website for you. The ideal WordPress Migration Plugin can quickly move your database, files, theme, and plugins. Often, the outcomes of using this method are more favorable than the manual method.
Sometimes, your web hosting provider may migrate the website for you. However, your host may offer the right plugin to help migrate your site.
The All-In-One WP Migration plugin is an excellent option for moving your WordPress Site. Used by more than 60 million websites today, it has various functions to help WordPress users migrate their websites — even people with limited technical knowledge.
Installing the Plugin
Log into your current WordPress website’s backend — the one you plan to migrate. Navigate to your Plugins section, search for the All-In-One WP Migration plugin, and install it. Afterward, you can activate the plugin.
Once done there, you must do the same on the destination website. At the end of the process, the plugin should be installed and activated on your current and destination websites.
Additionally, updating the core files, plugins, and themes on both sites is vital. The WordPress versions on the sites should also match.
Export Your WordPress Files
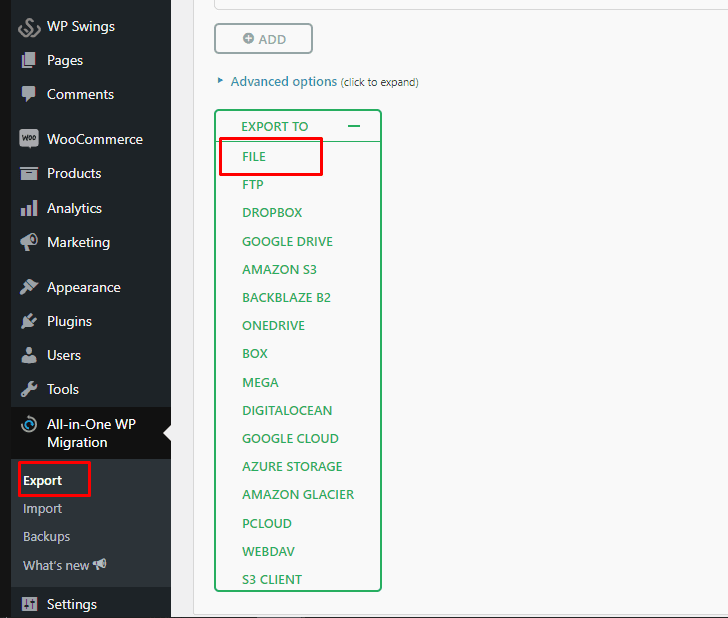
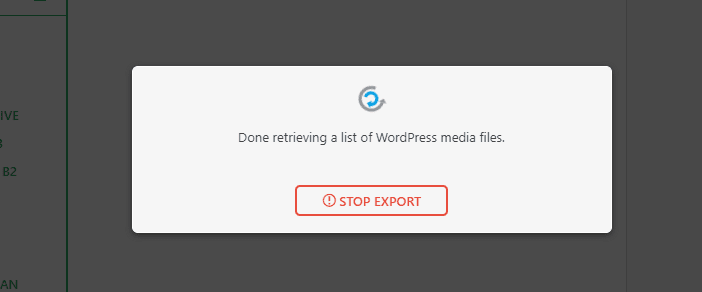
Now it’s time to migrate your WordPress website. You must create an export file with the help of the All-in-One WP Migration plugin.
You can include a rule to find the new WordPress site’s database prefix and replace it with the old one.

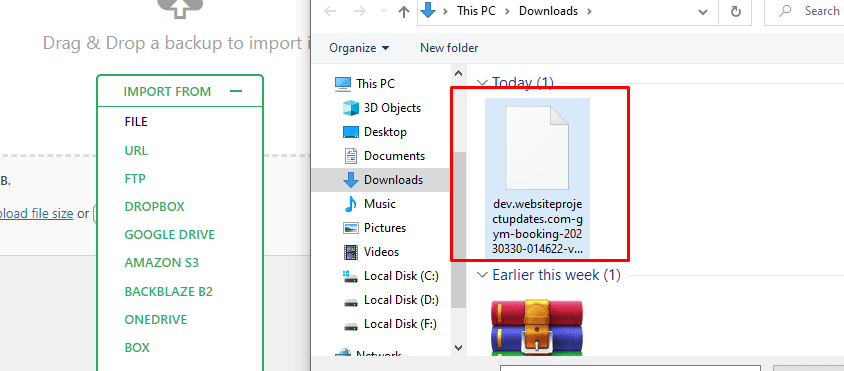
Then, you can Export to File and download it to your computer.
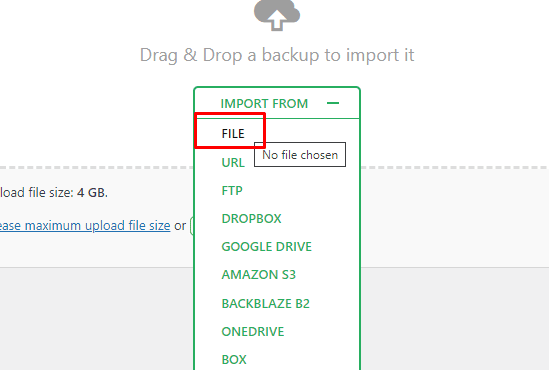
And on the new WordPress site, you can open your migration plugin to import the file.
Unpack your Files
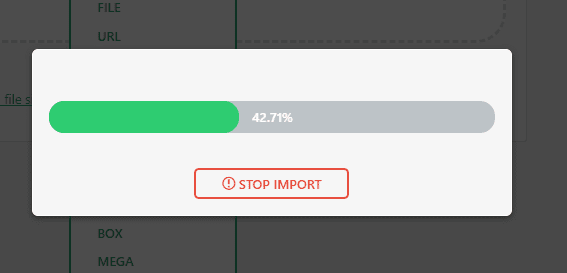
After uploading your file from the previous section, you can apply it to the new site.
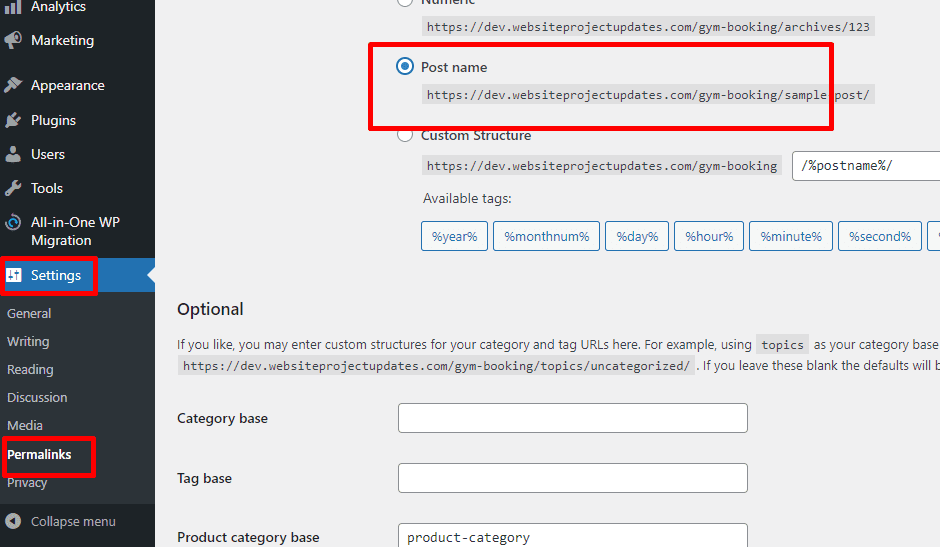
From Settings, go to Permalinks and save several times. Next, it’s time to check on your files by doing the following:
- Check plugins to ensure they’re all activated.
- Look for your images in your media library. If they’re not present, you can use your Regenerate Thumbnails plugin to reactivate them.
- Examine your pages and posts to see if they’re working as intended.
Also, you must install another plugin on your new WordPress site: the Better Search Replace plugin. It can help you replace your old site URL with the new one. So from your Dashboard, find the Better Search Replace section in your Tools. Simply add the old site URL to the ‘Search for’ field and add the new one to the ‘Replace with’ field!
However, it’s best to do a dry run before actually running the plugin. You should also review your theme files to ensure the URL replacements were satisfactory.
Lastly, you must give your site a once-over. If changes haven’t taken place, you should clear the browser cache. But if changes still haven’t occurred, you must clear the server cache.
The Manual WordPress Migration Process
With the appropriate plugins, moving your WordPress website from one host to another is more manageable. Manually migration is much more complicated and is not the recommended method for moving sites.
If you’re not careful, the migration might fail, especially if you own a large website. As a result, it’ll be negatively affected. Thus, backups are integral for any WordPress Website Migration, especially if you rely on a web host or manually migrate your site.
For instance, you might experience the following issues:
- Timed-out connections;
- Incorrectly-transferred files; or
- Corrupted database tables.
Migrate Your Site to the New Server
To manually migrate your site, you must first download a copy of your files and folders. If your host has FTP or cPanel File Manager, you can use them. Then, you must find your site’s root directory and download it. If you use FTP, please note that it’s generally slow.
Once done, you should get a copy of your site database and export it. If you have multiple databases, select the appropriate one. You can use the wp-config.php file to find the correct database.
Also, consider using phpMyAdmin, or whatever tools your host has provided for exporting. Don’t forget to use the SQL format universally used by WordPress databases.
Then, you can upload your backup site files in zip file form to your new server on the new host. After that, you can extract the folder. If WordPress is preinstalled, you must overwrite it. So, give your current root directory a new name, while the new directory you just created should have the root name.
Once done, you can start on the database. If you’ve set up the installation from scratch, you should create a new database by creating a new MySQL user. But, if you have WordPress preinstalled, there’s likely already a database user. Regardless of your database user status, you need to note your credentials.
Also, if you have preinstalled database tables, select Drop. Lastly, you can import your SQL file to the WordPress database.
Update Your DNS Records
Because you’ve moved your WordPress site to a different server, your domain must point to it. This step will apply if you change your site’s domain name. Sometimes, site domain name changes can coincide with a host change.
You should get your Domain Name System details from your website hosting provider. Fortunately, the information is often available via your chosen web host. A DNS can map your domain name to the appropriate server. Make sure to copy the necessary information from the website server.
So, you can update your DNS details via the domain registrar you bought your domain name from. With DNS records, they map your domain name to your site’s hosting server. Of course, you should update your records, so your domain points to your server.
Domain registrars have their own way of accomplishing this process, which you must check in their documentation. In addition, this update will take a while to reflect.
But often, web hosts will provide free domains in hosting packages. If your old host provided a free domain and you’re migrating to a new one, you should check if this will cause any issues with the domain.
Configure Your Website and Database
During this step, you can connect the pieces from past steps by configuring the database in the wp-config.php file. The first thing you must do is change these values:
- DB_NAME;
- DB_USER;
- DB_PASSWORD; and
- DB_HOST.
Note: if you’ve changed the table prefix’s value from ‘wp_,’ you might have to change ‘table_prefix.’ Also, if you’re replacing the host installation, consider using the wp-config.php as a template.
Configure the New Domain
You don’t need to follow this step if you didn’t change your domain. If you made some changes, you could configure the domain via the database. To have your domain point to the database, you need to change the siteurl and home values found in the wp_options table.
The process is simple — just right-click on those values and replace the current URL with the new one. After the configuration, the new website should be loading correctly. So, you can edit your links at this point in the transferring process. The process will affect your image files, so you might see some broken images.
Post-Migration Considerations
By this point, the website migration should is settled, meaning you’ve finished most of the WordPress Migration process! But before you end the procedure for good, you must do some final checks.
Disable Maintenance Mode (if Applicable)
If you enabled maintenance mode before the migration stage, you can disable it now. Also, since you’ve finished the migration process, you can allow users to return to the website.
Log Into the Migrated Site
You can log into your site after migrations to check for any errors. For instance, you can examine the dashboard and the plugins or theme.
Clear Your Caches
After migration, you need to clear every cache, including caches for plugins and browsers. Because they tend to create and store copies of your website, caches may have old copies of your site before the migration.
Test Your Site
Testing is necessary after changing your website before it goes live. You need to test the functionality of your migrated WordPress site. If you transferred your files successfully, the website is working as intended.
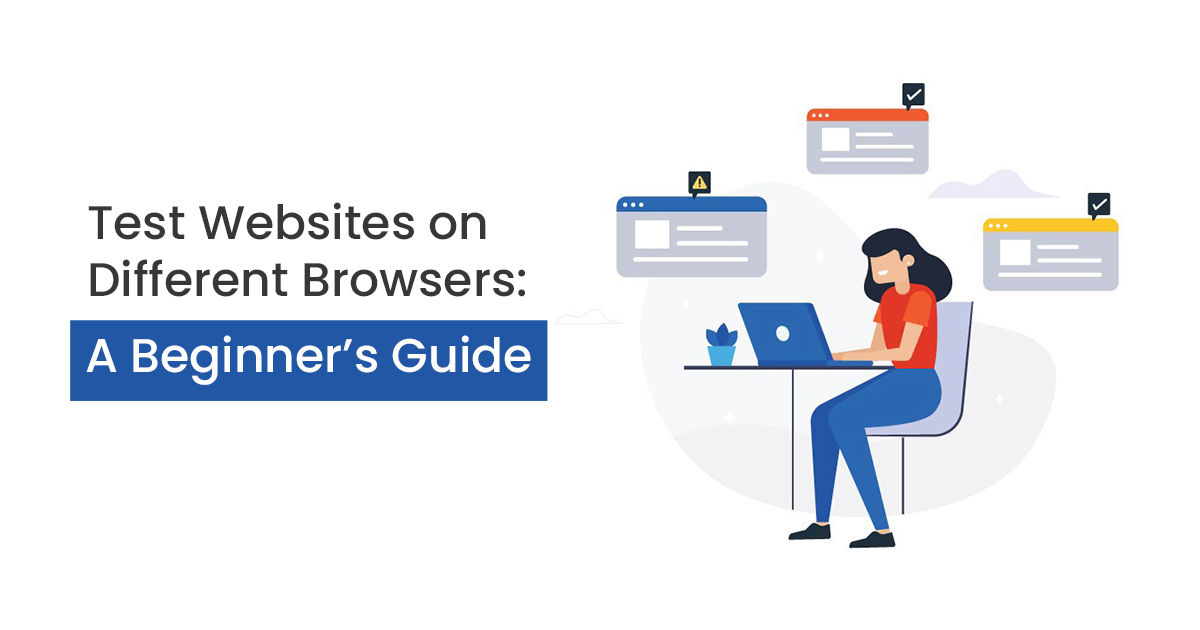
Thus, you must access your site from a browser and test its functionality like any user. You must also test your website on different browsers and devices to see how it looks. If you only rely on one device, you may not get a comprehensive picture of how your migrated site appears to other users.
Here are website elements to look out for:
- Are the WordPress files rendering correctly?
- Are all pages working as intended, especially the home page?
- Do your links lead to the appropriate destinations?
- Are your site’s forms performing well?
You can use these questions to examine your site for issues or concerns. You should remedy any post-migration problems quickly to consider migration complete.
Ensure DNS Records are Updated
Updating your DNS records so your domain can point to your new server can take up to 48 hours. You should keep your old WordPress site up until the change is fully propagated on your new server during that time. That way, your visitors won’t experience any downtime.
Once the DNS change has occurred, you can take down your old website for good.
Examine the Website’s SSL Certificate
Resetting the Secure Sockets Layer on the new server is necessary. So, you must reactivate or reconfigure your SSL on the migrated website.
Redirect to New URLs
When you migrate your website, you must preserve your SEO. So, you need to redirect old URLs to new ones to continue building your SEO efforts.
Close Your Previous Hosting Account
You shouldn’t cancel your previous hosting account until you know the migration process went well. After all, you wouldn’t want to lose access to your files before the transfer has been adequately completed.
As mentioned earlier, you should run your old and new websites after successfully migrating the site. That way, you can be sure your site has moved without any issues. Some errors can appear after the site was transferred days, weeks, or even months after the migration. This issue applies if you previously followed the manual migration process.
So, you must monitor the migrated website even after it’s gone live. Then, once you’re sure everything is settled and working without a hitch, you can close your old hosting account.
Common WordPress Migration Issues and How to Troubleshoot Them
After following the post-migration measures, you can continue running your site as scheduled. However, the process can be complicated, especially if you’re using the manual method. If the migration didn’t go as planned, you might experience data loss and have more downtime than anticipated.
So you need to know how to troubleshoot migration issues, especially if you manually transfer your website.
Of course, much like with the manual migration process, you have to follow a few standard maintenance tips, such as creating a website backup and updating your WordPress version. However, for post-migration, you must check for broken links and monitor site performance after the migration.
Here’s how you can solve some of the more common problems that arise from migration:
HTTP 500 Error
An HTTP 500 Error can occur for various reasons, and you’re not guaranteed an explanation. To avoid this error, it’s best to remember to disable your caching, redirect, or firewall plugins. Also, you must ensure your source and destination sites’ PHP versions match.
Error Establishing Database Connection
Often, this database connection error occurs because you have incorrect credentials on your wp-config.php file. To avoid this error, you need to correct the following credentials:
- DB_NAME;
- DB_USER;
- DB_PASSWORD;
- DB_HOST; and
- table_prefix.
Post-Migration SEO Concerns
Your SEO rankings may suffer if you mishandle URL redirects.
These are the top migration concerns you might encounter. If none of these measures are helpful, you can talk to a dedicated developer or your hosting provider’s support team. But if the migration process has failed, you can always start from the beginning.
Make Your WordPress Migration Work for You!
During migration, you must move your database, site files, themes, and plugins to a new host. However, reducing downtime, lost traffic, and SEO interruption is vital. Your website hosting provider may handle the migration for you or provide a trusted plugin to handle the work.
Of course, you can use a plugin such as the All-In-One WP Migration Plugin. Such a process is made more accessible with a dedicated tool for the job. However, you can opt to transfer your site manually.
Regardless of industry or business, every website owner wants their WordPress migration to be successful. After all, it results in a functional website with marked improvements from its previous iteration. If you want to ensure that you and your website come out on top at the end of the process, talk to a trusted WordPress Developer in the Philippines.