Are you looking for SEO plugins that would enhance your business website’s performance on search engine results pages (SERPs)? If so, then you are in for a treat! Let us discuss how you can quickly install and set up the Yoast SEO plugin on your WordPress website.
How to Install Yoast SEO Plugin
You can install a WordPress plugin in three ways:
METHOD ONE: Use WordPress Plugin Search (for free plugins only)
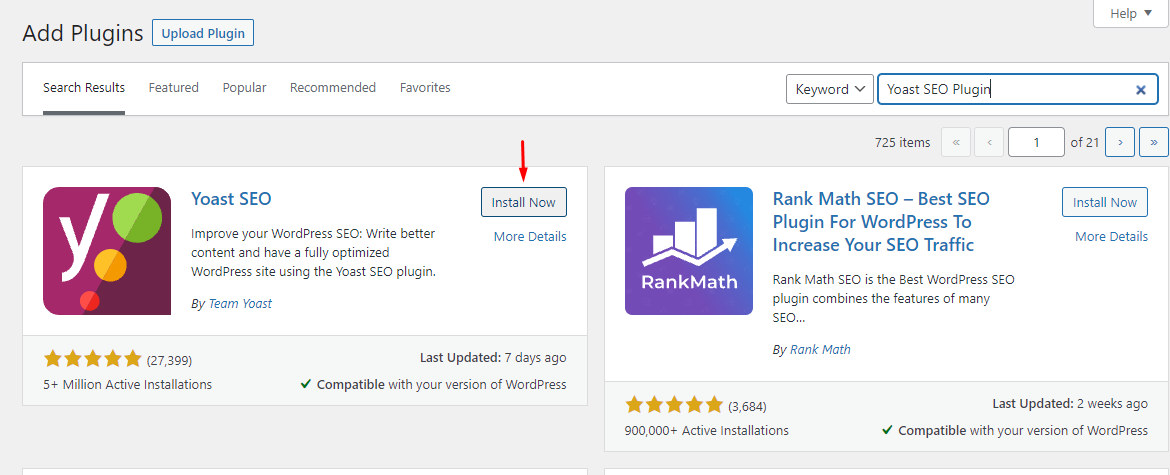
- On your admin dashboard, hover over the “Plugins” menu. Then, click on the “Add New Page” tab.
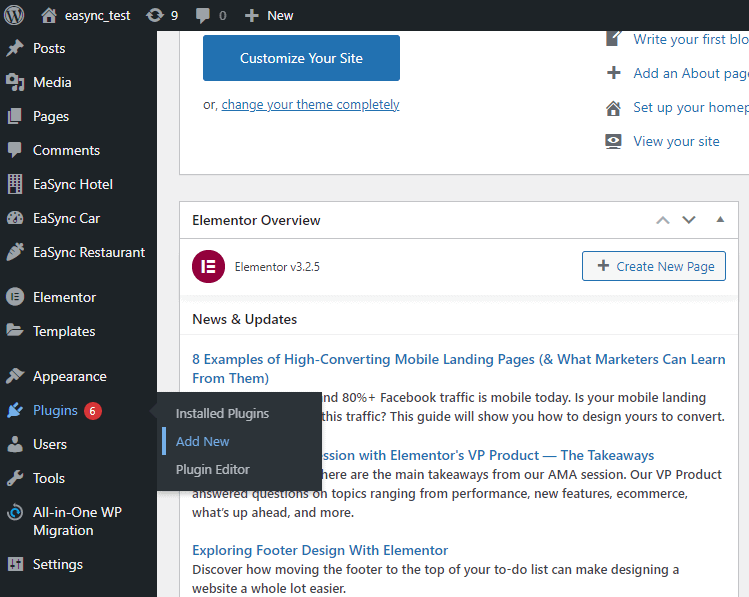
- Type in “Yoast SEO Plugin” on the search field to find the WordPress SEO Plugin by Yoast. Next, click on the “Install Now” button.
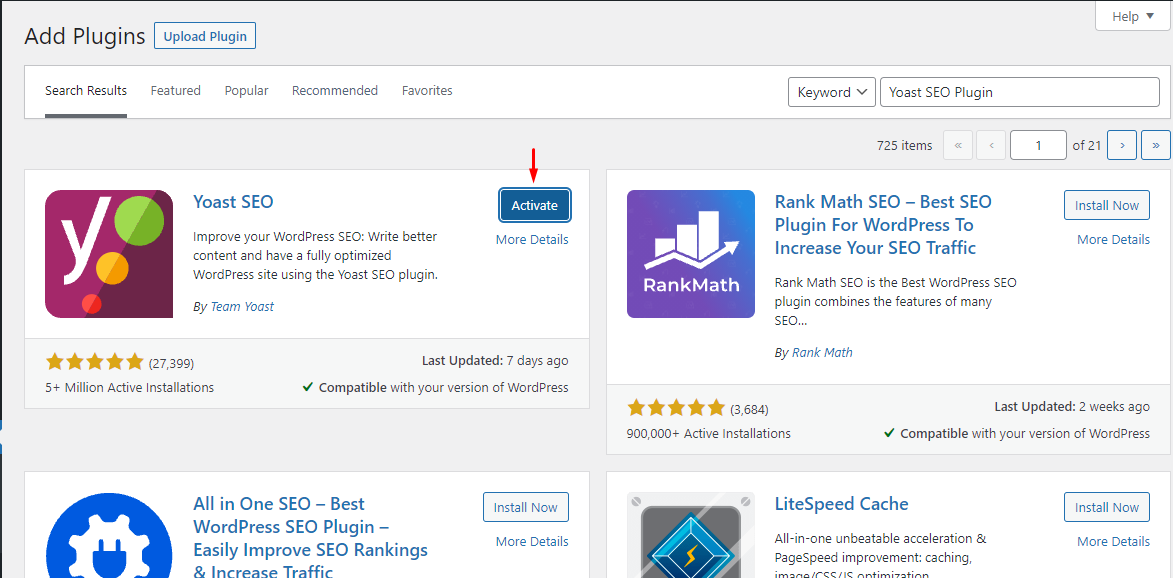
- After installation, activate the plugin by clicking on the “Activate” button. Configure the plugin settings as needed, and you’re done!
METHOD TWO: Use WordPress Admin Plugin Upload (for paid plugins)
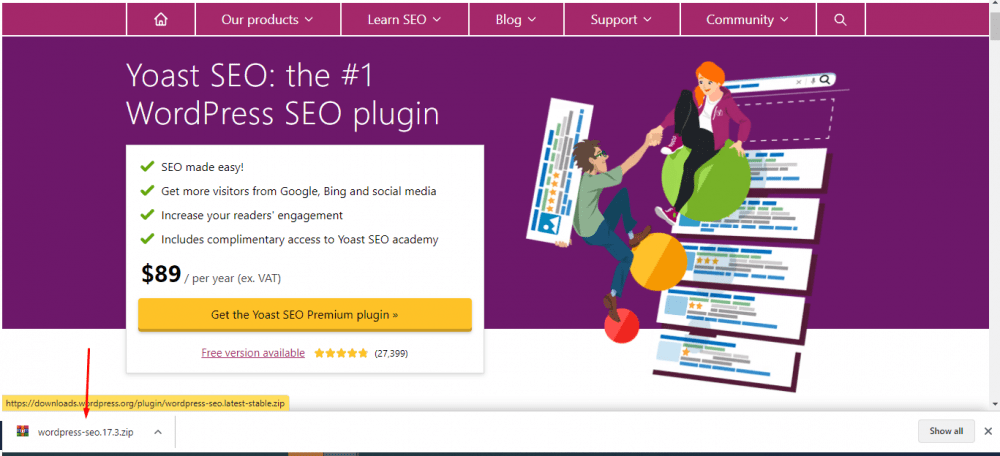
- Download the plugin from the source. You will be getting a zip file.
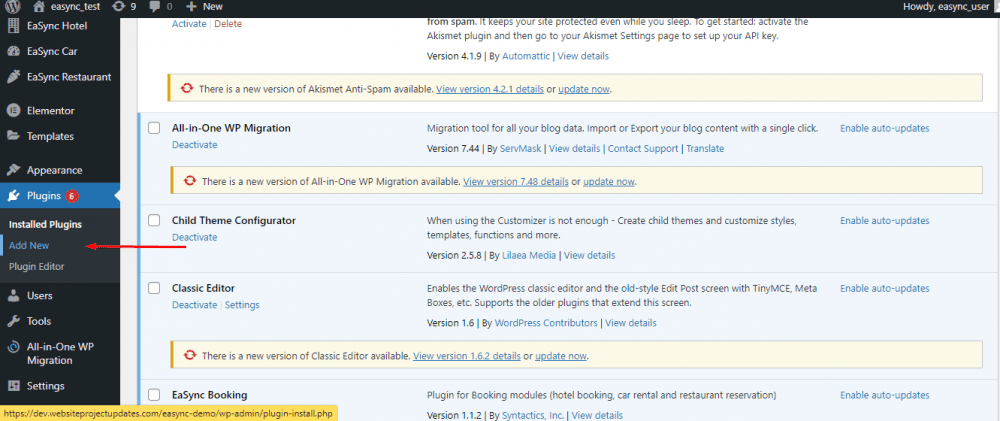
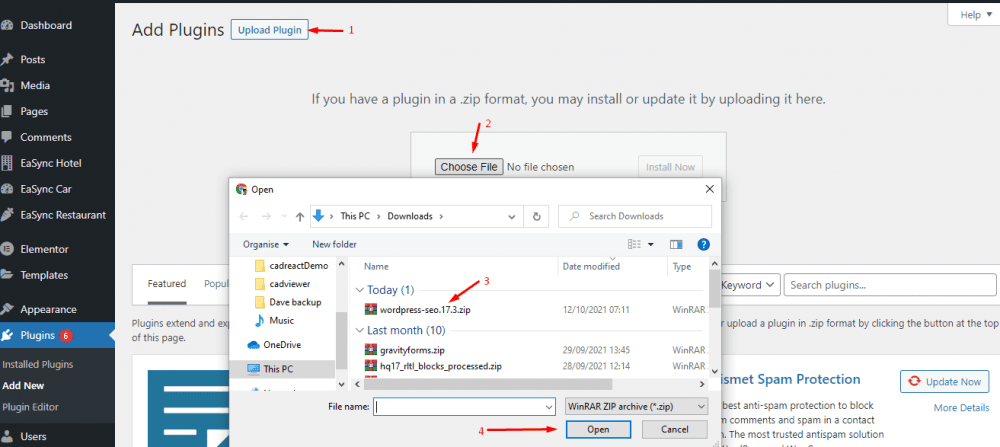
- On your admin dashboard, head to the “Plugins” menu and click on the “Add New Page” tab.
- Next, click on the “Upload Plugin” button located at the top of the page. You will then see the plugin upload form. Next, click on the “Choose File” button and select the WordPress plugin that you previously downloaded.
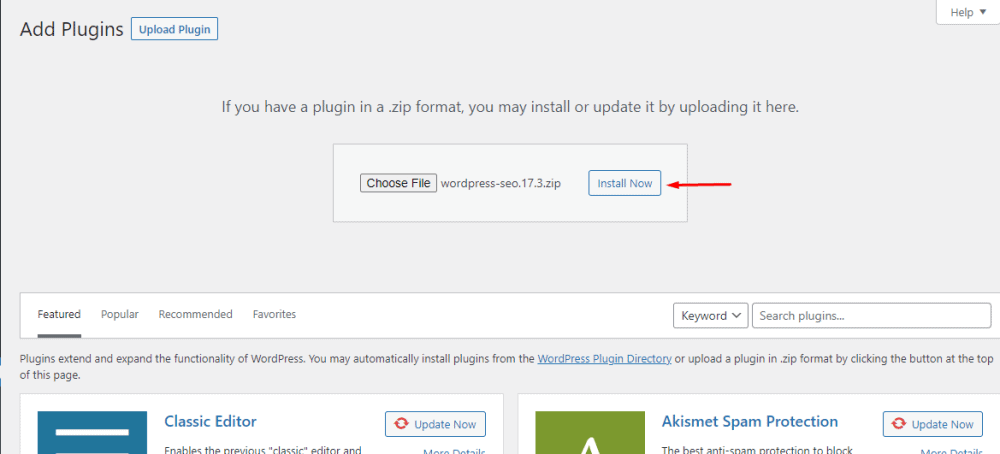
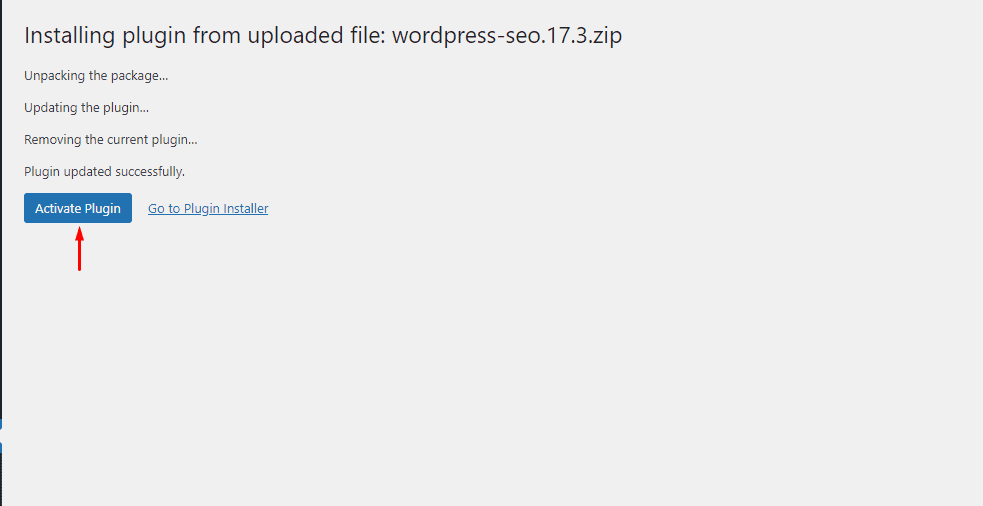
- After that, click on the “Install Now” button. WordPress would notify you if the installation was successful.
- Once you have installed the plugin, click on the “Activate” button to activate the plugin. Then, configure the plugin as needed, and you’re done!
METHOD THREE: Manually Install the WordPress Plugin via FTP
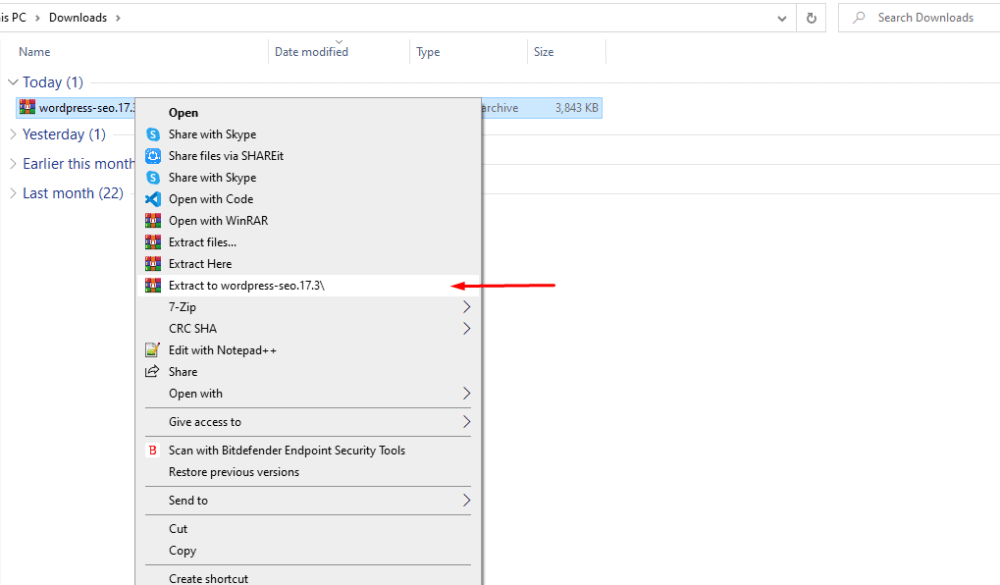
- Download the plugin’s source file (a zip file) and extract its contents on your device. You will find a new folder with the same name as the zip file. You will manually upload this folder to your WordPress website using FTP.
- Access your WordPress host through the FTP manager. Then, open the FTP client on your device and connect it to your website through the login credentials given by your website host.
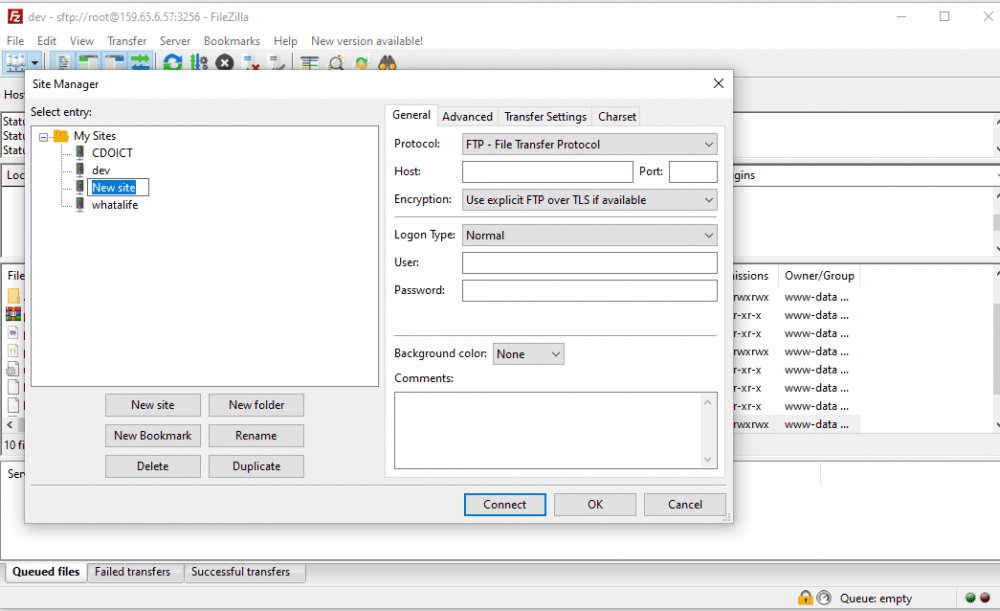
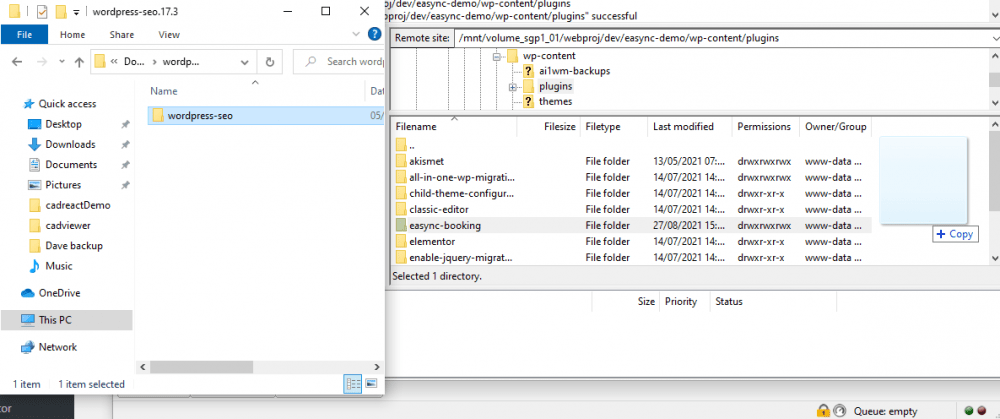
- After successfully connecting, head to the /wp-content/plugins/ folder on your WordPress site. Then, upload the folder you previously extracted from the zip file to the /wp-content/plugins/ folder on your web server.
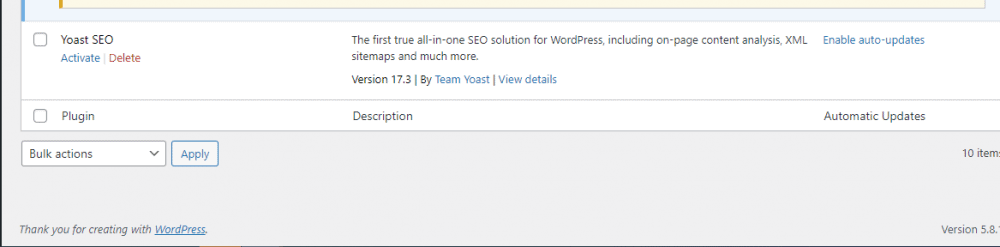
- Next, head to the WordPress admin dashboard and click on the “Plugins” menu. There, you will see if you have successfully installed the plugin.
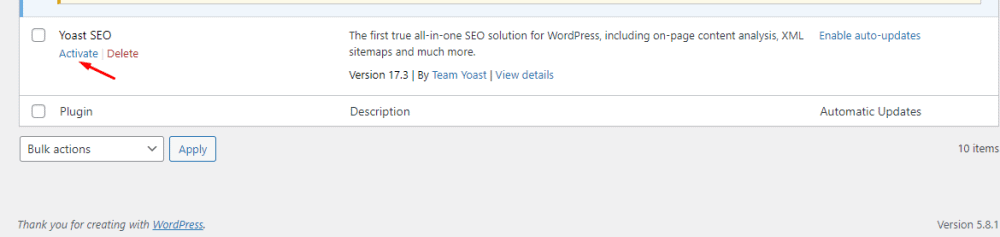
- Activate the installed plugin by clicking on the “Activate” button below it. Then, configure the plugin as needed, and you’re done!
Setting Up Yoast SEO Plugin on Your WordPress Website
STEP ONE: Import your SEO Data
You may skip this step if you set up the Yoast SEO plugin on a new WordPress site. However, suppose you plan to install the Yoast SEO plugin on an existing website to replace what you are currently using. In that case, you have to ensure that you properly transport all of your previous data first to this new plugin before deactivating the other ones. You can use a data transporter plugin such as SEO Data Transporter to do this.
STEP TWO: Configure the General Settings Tab
On your WordPress admin dashboard, click on the SEO icon to display the General settings page for the Yoast SEO plugin. You will see four tabs, namely: Dashboard, Features, Integrations, and Webmaster Tools.
Dashboard
By default, a configuration wizard notification will pop up on the page under the Dashboard tab. You can choose to follow the steps to set up Yoast. Or you can disregard it and follow our guide below.
Features
Under Features, you will see the following: SEO analysis, Readability analysis, Cornerstone content, Text link counter, XML sitemaps, Admin bar menu, Security: no advanced settings for authors, Usage tracking, REST API: Head endpoint, and Enhanced Slack sharing. By default, Yoast SEO switches these features on, but you can choose to switch any of these features off as needed. Click the “Save” button whenever making changes to the settings.
Integrations
The Integrations tab will show you the Yoast SEO plugin’s built-in integrations with third-party products, SEMrush and Ryte. These platforms are some of the best SEO tools that you can find on the market. SEMrush allows you to search for related keywords that match your focus keyword, thereby helping you improve your content. Ryte helps you check the indexability of your web pages. It would be best to leave these integrations turned on.
Webmaster Tools
The Webmaster Tools verification tab helps you verify your website with top search engines. It is also where you can get your website’s verification code for every search engine. You need to sign up for the webmaster tools program for every search engine to do this. After that, Yoast SEO will require you to add a meta tag so that you can verify your ownership of the site. Then, add the meta code you received from the search engines in the respective fields, and you’re done.
STEP THREE: Configure the Search Appearance Settings
In this part of the Yoast SEO plugin settings, you can control how your website will look on search engines.
General
Here, you can select what symbol you would like to use as a separator between your titles. By default, Yoast SEO uses the dash, but you can configure this depending on your preference. You can also set the SEO title and meta description of the homepage for your site. For static home pages, you can set up the title and description by editing each page individually. Once done, you can see the knowledge graph and schema options for your site, where you can choose whether your site represents an individual or an organization. You can also upload a profile picture (individual) or a website logo (organization/business) here.
Content Types
In this part of the settings, you can set the template for the SEO title and a default meta description. So, if you forget to add them manually, Yoast SEO will automatically fill these using your default settings. You can also choose whether to show the SEO meta box for your content types or not. If you leave the meta description blank, Yoast SEO will generate a description based on the first few lines of your content.
Media
WordPress automatically creates a new page for every image you attach to your pages or posts. However, these pages will only show the attachment (image or media). For that reason, search engines consider these pages to have low-quality content because they have no significant text to tell them what they are about. As a result, these pages will negatively impact your SEO. Fortunately, Yoast SEO fixes this by redirecting users to the attachment file instead of the attachment page. By default, Yoast SEO sets this option to “Yes.”
Taxonomies
Under the Taxonomies tab, you can set titles and meta for categories, tags, custom taxonomies, and post format archives. Then, Yoast SEO selects descriptions from your categories and tags.
Archives
You can control the search appearance settings for miscellaneous archive pages on your site, including author, date, search, 404 pages, and more. Yoast SEO’s default archives settings will already work fine for most websites. However, if you have a blog site with only one author, you have to disable author archive pages from search engines. Doing so would help you avoid creating duplicate pages (for single-author sites, the author archive page is the same as the date archive pages or your blog pages), thereby helping you improve your SEO rankings.
Breadcrumbs
Breadcrumbs are beneficial for internal linking as it creates a clear path to the page that a user is on. They also show up on SERPs. You can configure breadcrumbs as needed. Do not forget to enable the breadcrumbs option to make it visible with your WordPress theme.
RSS
Content scrapers use RSS Feeds to copy content from your site. With Yoast SEO, you can add a backlink to your site for every post in your RSS Feed. Because of this, you can get backlinks from their site, and search engines will know that you are the primary source for the content. Under RSS, you can add your author link, blog link, post link, and blog description.
STEP FOUR: Configure Social Media Integrations
Yoast SEO plugin also allows you to integrate your website with Facebook, Twitter, Pinterest, and other social media platforms. To do this, you only need to click on the Social link under the SEO menu, and you will see the following: Accounts, Facebook, Twitter, and Pinterest.
Under the Accounts tab, you can enter the URLs or usernames of your social media profiles. In doing so, Yoast SEO can tell search engines about the social media accounts linked to your website. You can then respectively configure the settings under the Facebook, Twitter, and Pinterest tabs.
STEP FIVE: Configure Tools
Here are some Yoast SEO built-in tools that will help you perform advanced tasks on your website.
Import and Export
With this tool, you can import SEO data from previously used plugins or themes with built-in SEO functions. In addition, this feature lets you import and export the Yoast SEO plugin’s settings if you want to use them on another WordPress website.
File Editor
Your WordPress website will grow, and you will encounter tutorials asking you to add some code to your site’s configuration files (.htaccess or robots.txt). These files have a significant impact on your site’s SEO. With Yoast SEO, you can easily configure said files directly from the WordPress admin dashboard.
Bulk Editor
With the use of the Bulk Editor, you can quickly add SEO titles and descriptions to all of your posts and pages. You can add your new SEO title for your blog post under the Titles tab. Then, click “Save” to store your recent changes. To add a description, you can head to the Descriptions tab and make the necessary changes.
Image Source: Yoast
If things get too complicated for you, you can always rely on a WordPress developer from the Philippines to help you. So let us help you install and set up the Yoast SEO plugin on your WordPress website now!