Aside from social media marketing, another effective way to keep your communication lines open with existing clients is through email marketing. To do this, you would need to build an email list on your business website. As such, in this article, we will go through the quick and easy steps on how you can integrate a mailing list with WordPress.

Why Integrate a Mailing List in WordPress?
A mailing list is a directory of the people who requested regular updates from you through email. These are the people who entered their information in your website’s opt-in form. So, if you are still starting with your online business, make sure you integrate a mailing list into your WordPress site.
You can use your mailing list to interact with your customers using email marketing software. Through email communications, you can let your existing customers and even your potential clients know about your latest products, offers, news, events, and the like.
Today’s popular email marketing software includes Mailchimp, HubSpot, Constant Constant, SendinBlue, AWeber, Drip, and ConvertKit.
Steps to Integrate a Mailing List with WordPress
For this tutorial, we will use Mailchimp as our email marketing software. Then, to create our WordPress forms, we will use the Gravity Forms plugin.
STEP ONE: Get Your API Key from Mailchimp
First, you need to obtain an API key from Mailchimp to connect Mailchimp to Gravity Forms on WordPress. Then, you have to input this API key on the Gravity Forms backend. Follow these steps to get your Mailchimp API key:
- First of all, log in to your Mailchimp account.
- After that, tap on your name or profile image (at the lower-left corner of the screen).
- Next, click on the “Account” button, then hit the “Extras” button. Then, click “API keys.”
- Then, scroll down to the “Your API keys” section. Next, tap on the “Create A Key” button.
- After that, the page will reload, and you will see your new key in the “Your API keys” section.
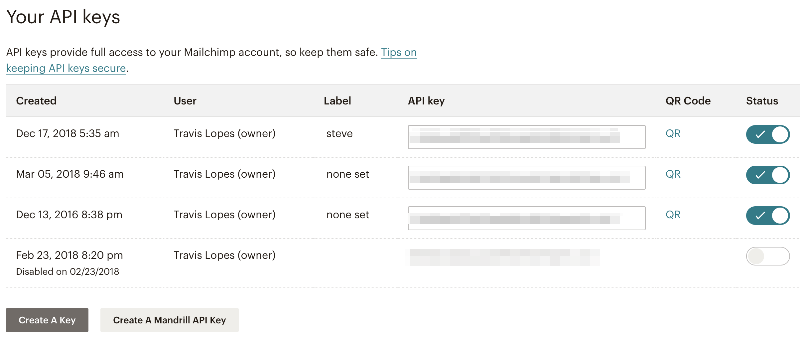
Image Source: Gravity Docs
STEP TWO: Enter API Key in Gravity Forms Backend
In this step, you have to have already installed the Mailchimp add-on on WordPress before you can connect it with Gravity Forms. Quickly follow this guide on how to install the Gravity Forms add-on. After installing the add-on, you can set up your Mailchimp API key into the Gravity Forms backend.
- First, click on “Forms” on the WordPress admin dashboard sidebar.
- After that, hit on the “Settings” button and then click “Mailchimp.”
- Next, enter your Mailchimp API key on the box provided.
- Then, tap on “Update Settings.”
- A green checkmark will signify that you have successfully entered the API key.
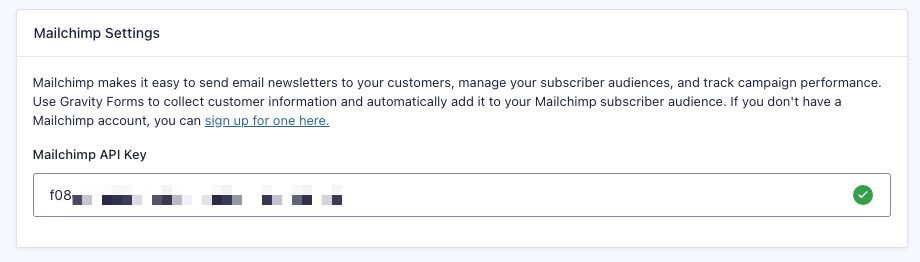
Image Source: Gravity Docs
STEP THREE: Create a Mailchimp Feed
Now that you have finished entering your Mailchimp API key into the Gravity Forms backend, you can create your Mailchimp feed. Your Mailchimp feed will instruct your form about how and when it should send submission information to Mailchimp. It is also where all of the entries from the Gravity Form submission will be stored. Below are the steps on how you can create a form that will serve as your feed’s reference:
- On the WordPress admin dashboard, hover on the Gravity Forms icon.
- A dropdown menu will appear. Hit the “New Form” button.
- After that, you should supply a name for the form.
- Then, type in your name, email address, physical address, and phone number.
- Double-check your entries before hitting the “Update” button.
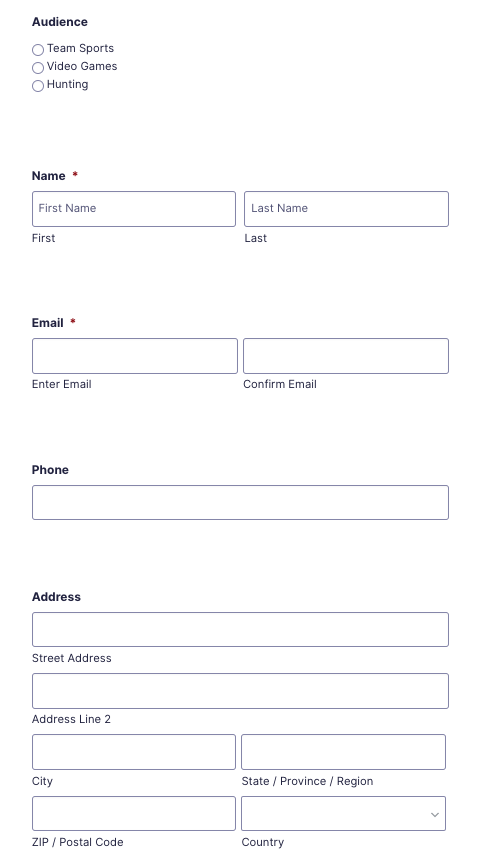
Image Source: Gravity Docs
After creating the form, you can begin creating your Mailchimp Feed.
- First of all, head to the top of the form and hover over the “Settings” tab.
- Then, from the dropdown menu, tap on “Mailchimp.”
- It will display the Mailchimp Feeds page, where you can tap on the “Add Now” button to make your feed.
- Next, provide the necessary information to the feed, including its name and audience. Note: You have to create an audience first in your Mailchimp account before it appears here.
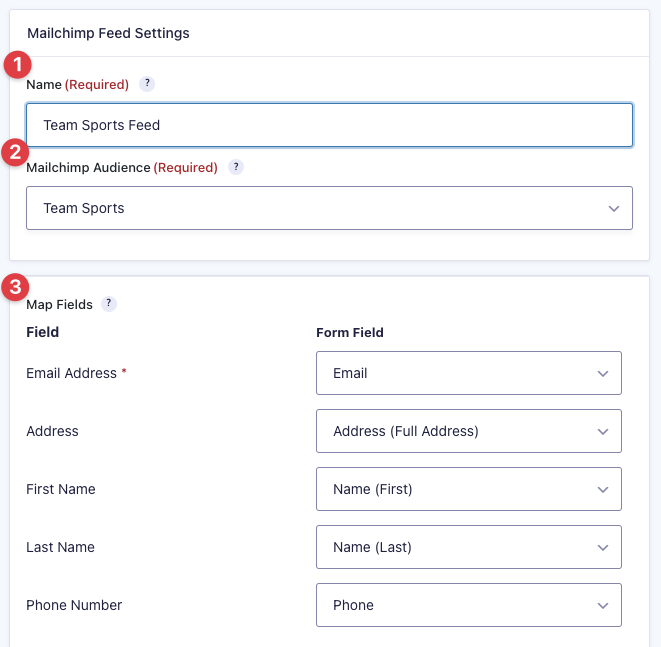
Image Source: Gravity Docs - Then, you need to map each Mailchimp field with its corresponding form field. In the example above, the Mailchimp fields “Email Address,” “Address,” “First Name,” “Last Name,” and “Phone Number” should respectively correspond with the Form Fields “Email,” “Address (Full Address),” “Name (First),” “Name (Last),” and “Phone.”
- After that, you should click on the box beside the particular group where you want to add the user. Note: You should first create groups in your Mailchimp account before it appears here (instructions in STEP FOUR: Create a Mailchimp Group).
- You have the option to choose from the provided Marketing Permissions or leave them unticked.
- You also have the option to leave “Double Opt-In” and “Mark subscriber as VIP” unticked.
- After that, enter the relevant tags. Then, add a note when needed.
- Next, enable or disable the Conditional Logic on your form.
- Finally, tap on the “Save Settings” button.
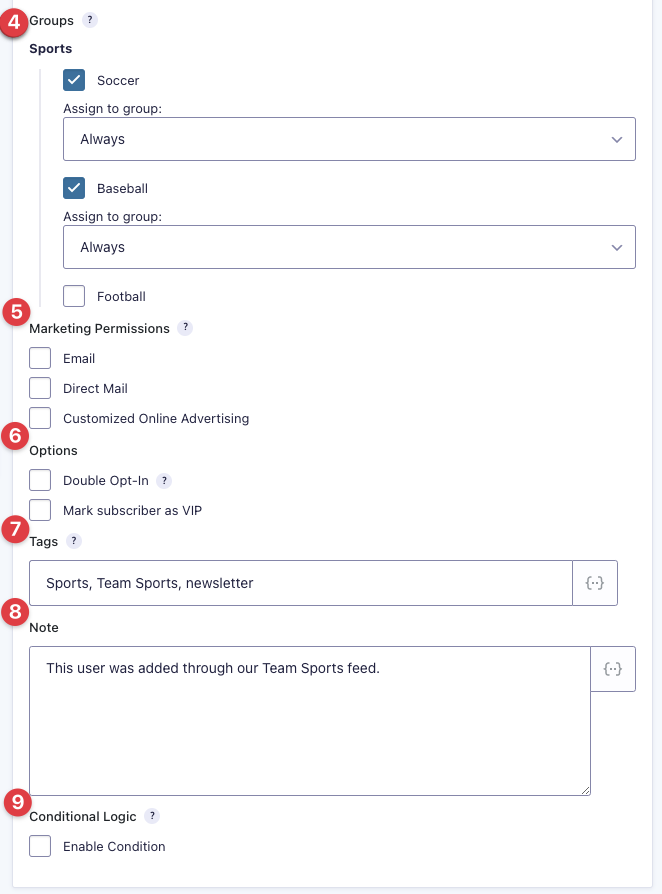
Image Source: Gravity Docs
STEP FOUR: Create a Mailchimp Group
You have now reached the final step in the process of integrating a mailing list with WordPress. This particular step will discuss how you can create a group in your Mailchimp add-on. With the use of groups, you can better target your subscribers. You can also organize entries depending on their category. These groups will work great if you have multiple form submissions.
Before anything else, check if the group already exists in Mailchimp. If it is not available in Mailchimp, you have to log into your Mailchimp account and create the group. To create a Mailchimp group, here’s what you should do:
- First, in your Mailchimp dashboard, click on the “Audience” icon.
- Then, hit the “Audience dashboard” tab from the dropdown menu.
- In case you have more than one audience, you can hit on the “Current audience” dropdown and select the one you prefer to work with.
- After that, click the “Manage Audience” dropdown and select “Manage contacts.”
- Click on the “Groups” button and tap on the “Create Groups” button.
- Select an option on how the groups will look on your signup form (see image below).
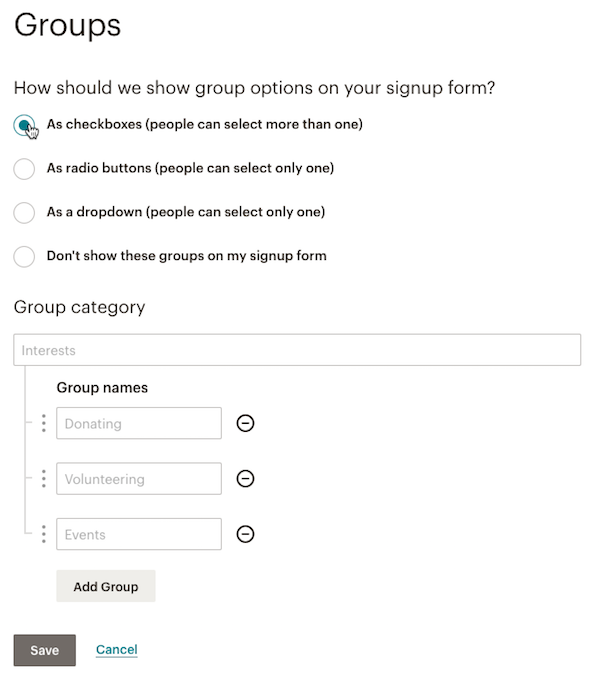
Image Source: Mailchimp - Next, enter a group category, which will serve as the overall theme for your groups.
- Also, enter at least one group name.
- Then, click on “Add Group” to create more group names.
- Finally, tap on the “Save” button to store the changes you have made.
Now, to add subscribers into their appropriate groups, here’s what you should do:
- First, select the audience that contains the group that you want to work with for your feed.
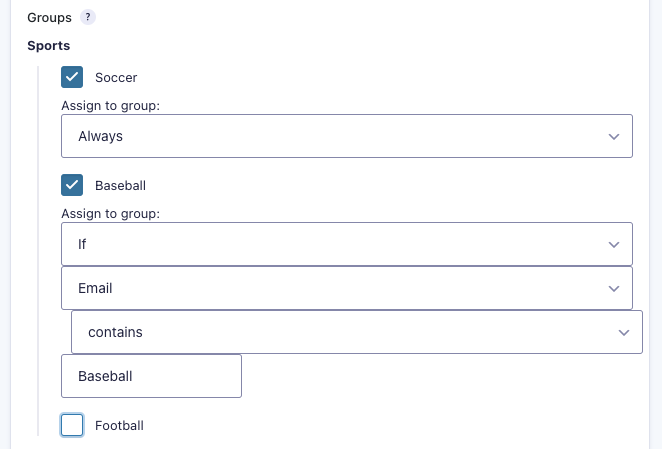
Image Source: Gravity Docs - You will automatically see checkboxes beside the groups that exist in the audience. After enabling a group, you will decide whether to add all subscribers on the form to the audience. You can also select only those that fall under a specific condition. Here’s a guide on how to enable conditional logic for a field.
- Lastly, tap on the “Save” button to store your changes.

Integrate Mailing List with WordPress and Improve Email Marketing Campaigns!
So, make the most out of email marketing and boost your online business! Follow the steps mentioned above to integrate a mailing list with your WordPress website properly.
If you still have queries or concerns with WordPress web development, feel free to contact a WordPress web developer. You’ll see—they know what they’re doing!